An isometric tactics RPG made in Unity. The project is inspired by tactical turn-based JRPGs such as Final Fantasy Tactics for the Playstation and Final Fantasy Tactics: Advance for the Game Boy Advance.
The game is divided into various missions, with each mission taking place on a defined template level. Each level is an Isometric 3D grid made up of grid blocks. We can place our player character at any one of the spawning points at the start of the mission, and then begin. The enemy character will already be spawned. Future features for the game loop will include party-based gameplay, a combat system, and radiant missions.
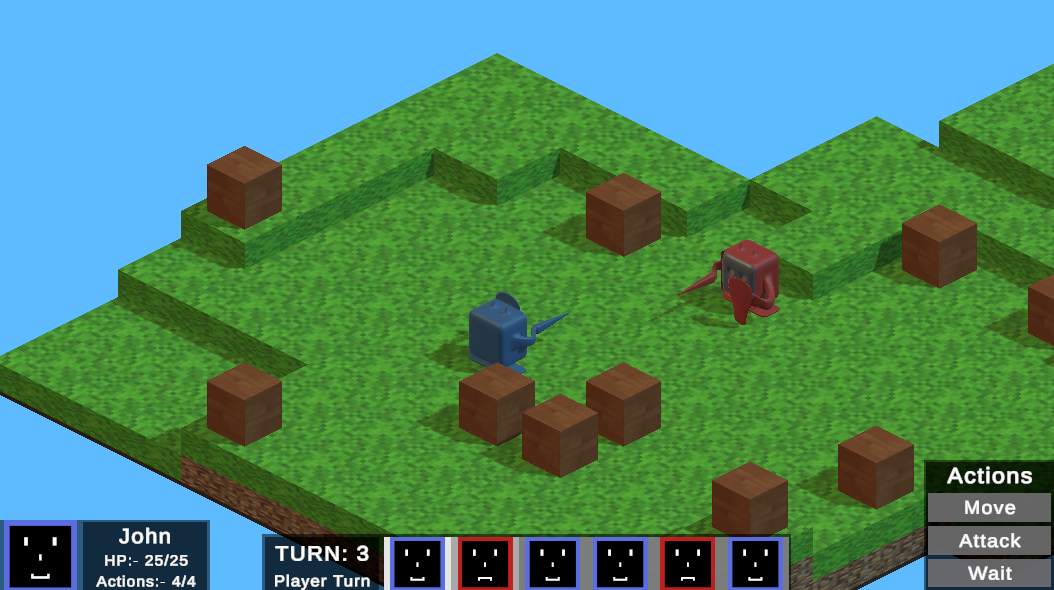
The project requires the creation of complex 3D grids and placement of obstacles on that grid. Since it can become tedious to generate or edit each element and assign references, we use Unity editor scripting to provide level generation tools. The editor tools edit a scriptable object that holds the grid data.
For the isometric 3D grid, we have defined its structure as:-
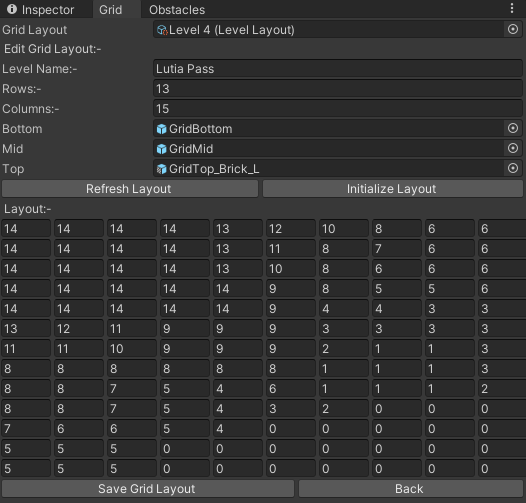
This window was created using Editor scripting. Here we can either create a new Level layout or edit an existing level and its properties. Once we have done that, we can save the layout asset and use it accordingly.
// GridTool.cs
void OnGUI()
{
    ...
    if (state != WindowStates.EMPTY)
    {
      if (state == WindowStates.NEW)
      {
        ...
      }
      else if (state == WindowStates.LOAD)
      {
        asset = (LevelLayout)EditorGUILayout.ObjectField("Grid Layout", asset, typeof(LevelLayout), true);
      }
      if (asset != null)
      {
        GUILayout.Label("Edit Grid Layout:-");
        asset.levelName = EditorGUILayout.TextField("Level Name:- ", asset.levelName);
        asset.rows = EditorGUILayout.IntField("Rows:- ", asset.rows);
        asset.columns = EditorGUILayout.IntField("Columns:- ", asset.columns);
        asset.bottom = (GameObject)EditorGUILayout.ObjectField(
                       "Bottom", asset.bottom, typeof(GameObject), true);
        asset.mid = (GameObject)EditorGUILayout.ObjectField(
                       "Mid", asset.mid, typeof(GameObject), true);
        asset.top = (GameObject)EditorGUILayout.ObjectField(
                       "Top", asset.top, typeof(GameObject), true);
        GUILayout.BeginHorizontal();
        if (GUILayout.Button("Refresh Layout"))
        {
            asset.layout = new int[asset.rows * asset.columns];
        }
        if (GUILayout.Button("Initialize Layout"))
        {
            asset.layout = new int[asset.rows * asset.columns];
            for (int i = 0; i < asset.rows; i++)
            {
                for (int j = 0; j < asset.columns; j++)
                {
                    asset.layout[(asset.rows - i - 1) * asset.columns + j] = 1;
                }
            }
        }
        GUILayout.EndHorizontal();
        GUILayout.Label("Layout:- ");
        for (int i = 0; i < asset.rows; i++)
        {
          GUILayout.BeginHorizontal();
          for (int j = 0; j < asset.columns; j++)
          {
            asset.layout[(asset.rows - i - 1) * asset.columns + j] =
            EditorGUILayout.IntField(asset.layout[(asset.rows - i - 1) * asset.columns + j]);
          }
          GUILayout.EndHorizontal();
        }
      }
      ...
    }
}
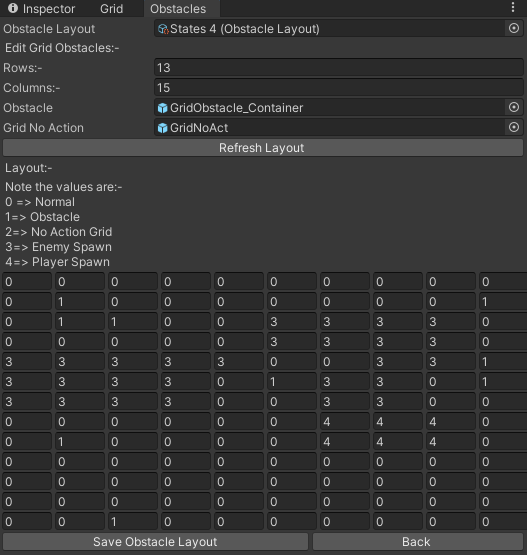
In the same way, we can define another window to edit the Obstacle layout. We can specify the rows and columns of the grid, and define the obstacle prefab to place in a given position. We can place special grids such as No Action Grids, where actions such as combat cannot be performed. We also mark the possible spawn points for the enemies and player character.
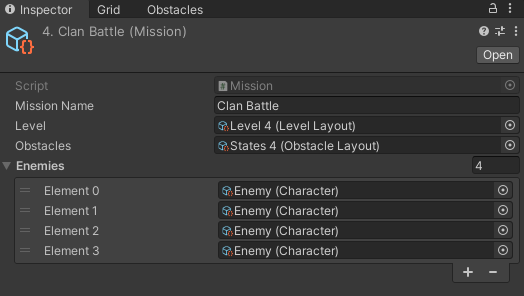
Once we have both level layout and obstacle layout assets, we can define a Mission asset. This mission will take in variables such as mission name, level layout, obstacle layout and enemy list. We assign the mission to a template empty scene and here we will generate our grid with the obstacles placed on it. Once the mission starts, the enemies get spawned at random on the possible spawn points.
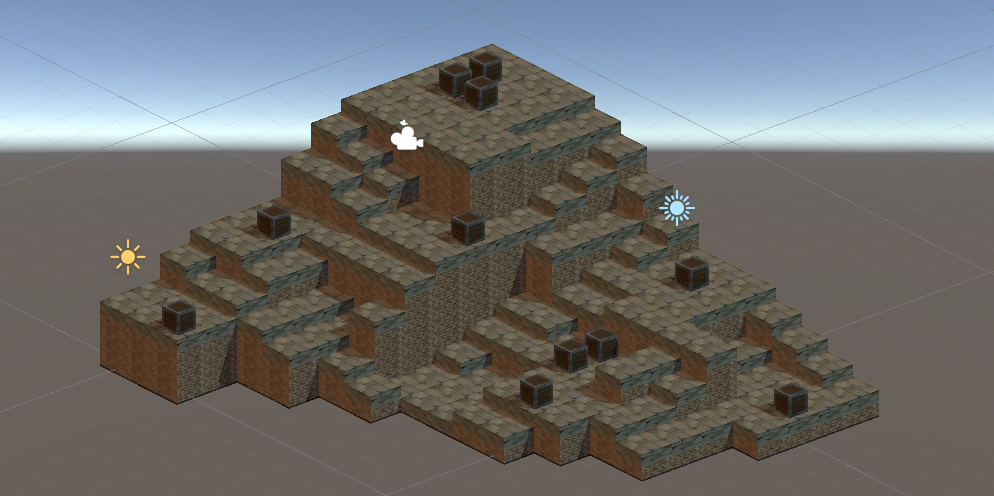
Various input options have been given to the player so that they can interact with the level. Some of them are:
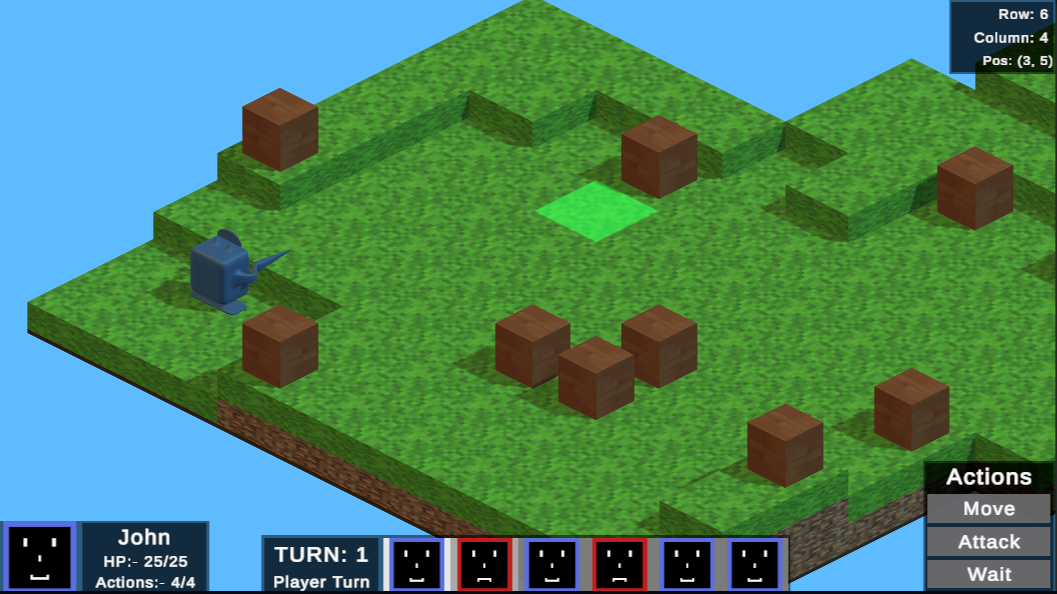
// InputManager.cs
void Update()
{
    if (Input.GetKeyDown(KeyCode.Escape) || Input.GetKeyDown(KeyCode.P)) // Toggle pause menu on or off
    {
        ui.TogglePause();
    }
    if (Input.GetKeyDown(KeyCode.Q)) // Zoom In
    {
        cam.orthographicSize -= 0.33f;
        cam.orthographicSize = CustomMath.ClampF(
            cam.orthographicSize,
            camFollow.camZoomLimits.x, camFollow.camZoomLimits.y);
    }
    if (Input.GetKeyDown(KeyCode.E)) // Zoom Out
    {
        cam.orthographicSize += 0.33f;
        cam.orthographicSize = CustomMath.ClampF(
            cam.orthographicSize,
            camFollow.camZoomLimits.x, camFollow.camZoomLimits.y);
    }
    if (canInput) // Can Input
    {
        if (Input.GetMouseButtonDown(1)) // Drag Start
        {
            camFollow.StartDrag();
        }
        if (!Input.GetMouseButton(1)) // Release Dragging
        {
            camFollow.StopDrag();
        }
        if (Input.GetKeyDown(KeyCode.F)) // Set back to snap
        {
            camFollow.Snap();
        }
        ...
    }
}
Each mission flows through a turn system. There are two parts of a mission:
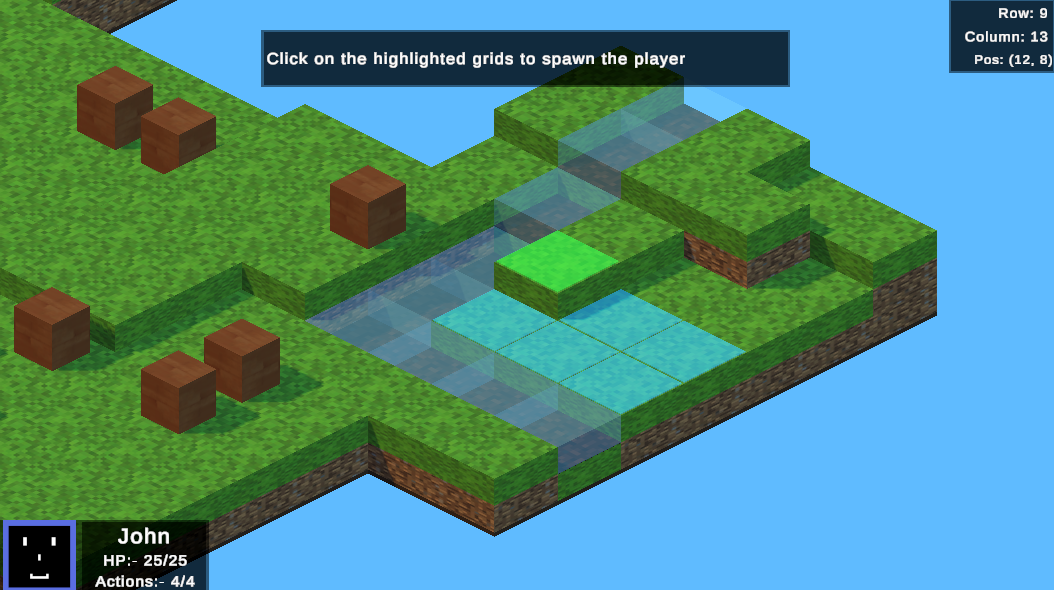
// TurnManager.cs

// Starts the player spawning process
public IEnumerator StartPlayerSpawning()
{
    yield return cam.StartCoroutine("SnapToTarget", levelManager.playerSpawnPoints[0].gameObject);
    SetPhase(TurnPhase.SPAWN);
    ui.ShowHint("Click on the highlighted grids to spawn the player", false);
    foreach (GridElement element in levelManager.playerSpawnPoints)
    {
        element.ActionHighlight();
    }
    playerPrefab.GetComponent<Stats>().SetStats();
    ui.ShowCharacterUI(true, playerPrefab.GetComponent<Stats>()); // Show Player UI
}

// Confirms the player's choice regarding player spawning
public IEnumerator ConfirmPlayerSpawning(GridElement element)
{
    yield return new WaitForSeconds(Time.deltaTime);
    if (levelManager.playerSpawnPoints.Contains(element))
    {
        SetPhase(TurnPhase.ENDING);
        element.ShowHighlight();
        ui.ShowHint("Press Enter/Left-Click to confirm spawning this character at the selected grid. Space to go back", false);
        GameObject tempPlayer = Instantiate(playerPrefab,
                                element.transform.position +
                                Vector3.up * playerPrefab.GetComponent<Pathfinding>().maxYDiff,
                                Quaternion.identity);
        while (true)
        {
          if (Input.GetMouseButtonUp(0) || Input.GetKeyDown(KeyCode.Return))
          {
              foreach (GridElement grid in levelManager.playerSpawnPoints)
              {
                  grid.HideHighlight();
              }
              ui.HideHint();
              ...
              break;
          }
          if (Input.GetKeyDown(KeyCode.Space))
          {
              Destroy(tempPlayer);
              element.ActionHighlight();
              StartCoroutine("StartPlayerSpawning");
              yield break;
          }
          yield return new WaitForSeconds(Time.deltaTime);
        }
        StartCoroutine("StartGame");
    }
    else
    {
        ui.ShowHint("CANNOT SPAWN PLAYER AT THAT GRID!", true);
    }
}
// TurnManager.cs

// Defines the types of turns available
public enum TurnType
{
    NONE, // No Turn
    PLAYER, // Player's Turn
    ENEMY, // Enemy's Turn
}

// The various phases which make up a turn
public enum TurnPhase
{
    NONE, // No phase
    SNAPPING, // Snapping to character
    SPAWN, // Spawning a player character
    CHECK, // Checking whether action left to go to menu
    MENU, // Choosing action in Action Menu
    MOVE, // Choosing grid to move to
    MOVING, // Moving to chosen grid
    ATTACK, // Choosing grid to attack
    ATTACKING, // Attacking chosen grid
    ENDING, // Ending this turn
}
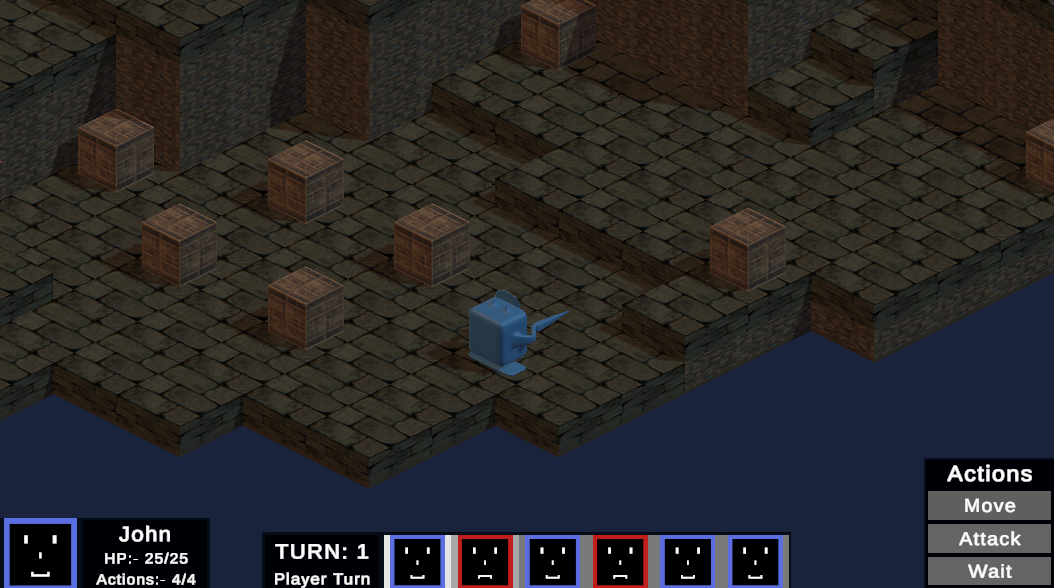
Both the player and enemy characters can move on the 3D grid using a custom implementation of the A* algorithm to find the optimal path between two grid blocks. You can access information on the implementation of the A* algorithm through this project.
For our 3D grid, the algorithm takes in the character’s jump stat to define whether it can move from one block to the next. An example of this is, if the jump stat is 2 and the height gap between two blocks is 3, then the character cannot directly move to that block.
Now, the motion for the two types of character’s takes place as:
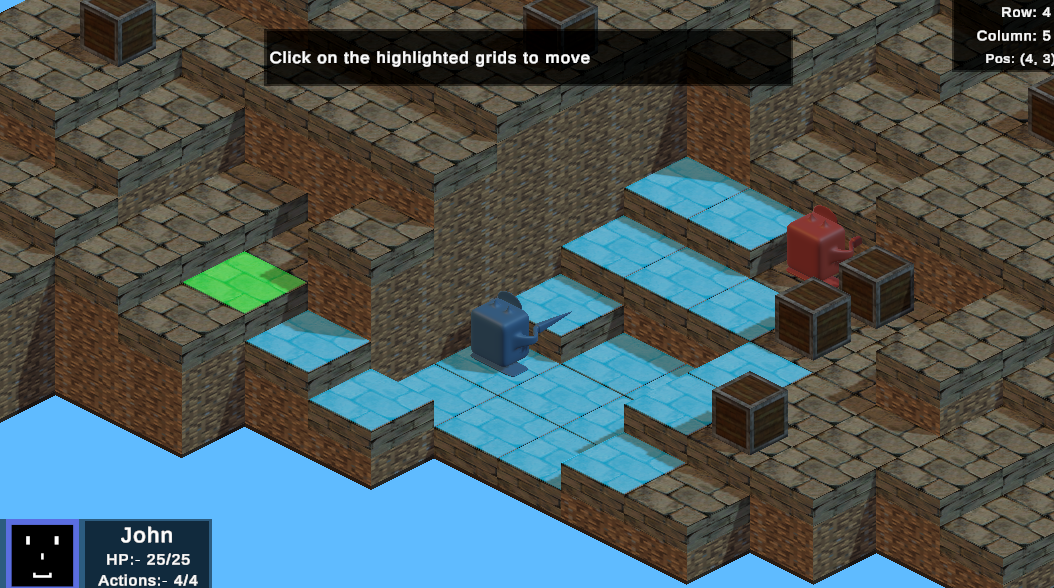
// TurnManager.cs
public void ProcessGridClick(GridElement element)
{
    if (phase == TurnPhase.SPAWN) // Currently spawning for player
    {
        StartCoroutine("ConfirmPlayerSpawning", element);
    }
    else if (phase == TurnPhase.MOVE)
    {
        if (element.IsTraversable(true))
        {
            MovePlayer(element);
        }
    }
}
...
// Moves the player to the target grid
public void MovePlayer(GridElement target)
{
    if (highlightedGrids.Contains(target))
    {
        Path path = playerPath.GetPath(target);
        foreach (GridElement grid in highlightedGrids)
        {
            grid.HideHighlight();
        }
        inputManager.HideHighlight();
        target.ShowHighlight();
        StartCoroutine("MoveCharacterAlongPath", path);
    }
    else
    {
        ui.ShowHint("CANNOT TRAVEL TO TARGET GRID!", true);
    }
}
...
// Moves the character along the path
public IEnumerator MoveCharacterAlongPath(Path path)
{
    yield return cam.StartCoroutine("SnapToTarget", current);
    SetPhase(TurnPhase.MOVING);
    current.GetComponent<Pathfinding>().MoveViaPath(path);
}
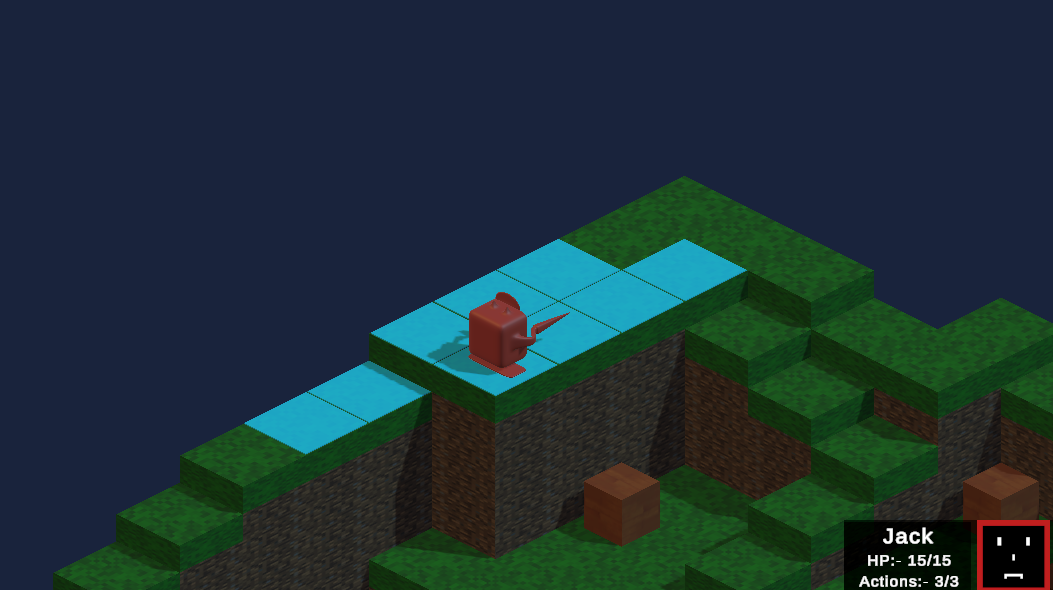
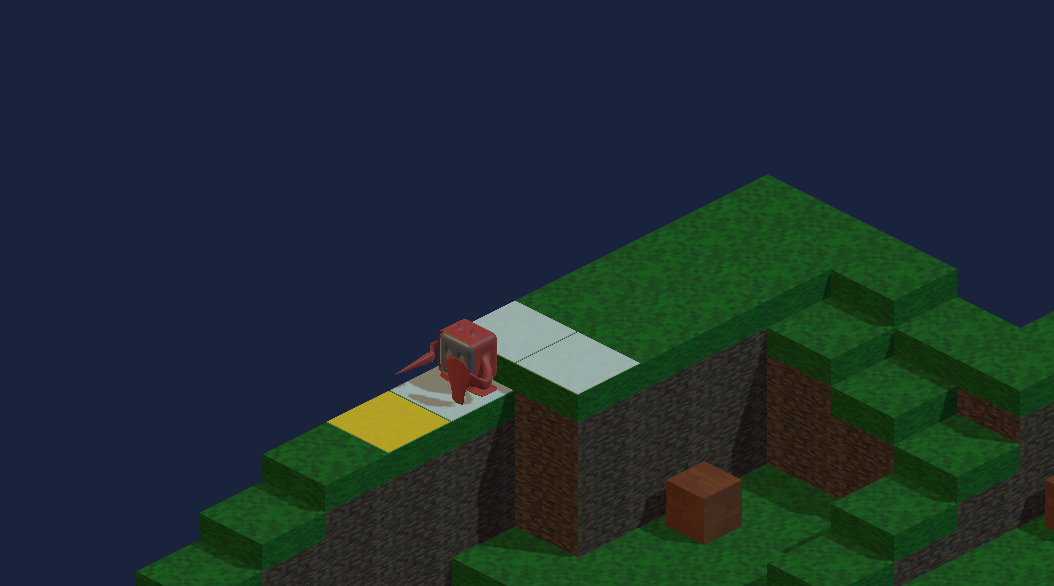
// TurnManager.cs

// Moves the enemy to a player grid
public Path GetEnemyPath()
{
    ...
    foreach (GridElement neighbour in playerGrid.neighbours)
    {
        if (neighbour.IsTraversable(false))
        {
            if (Mathf.Abs(playerGrid.height - neighbour.height) <= enemyStats.character.jump)
            {
                Path nPath = enemyPath.GetPath(neighbour);
                int pDist = nPath.GetPathDistance() + enemyGrid.GetDistance(nPath.elements[0]);
                if (nPath.IsCompletePath(neighbour))
                {
                    ... // Add an entry to complete path
                }
                else
                {
                    ... // Add an entry to incomplete path
                }
            }
        }
    }
    Path path = new Path();
    if (completePaths.Count > 0)
    {
        path = completePaths[0];
    }
    else
    {
        path = incompletePaths[0];
    }
    path.FixForGrids(highlightedGrids);
    return path;
}
...
// Starts the enemy turn showing the grids and initiating action
IEnumerator StartEnemyTurn()
{
    yield return new WaitForSeconds(enemyTurnWaitTime); // Wait for a few seconds on the menu phase
    StartMovePhase();
    yield return new WaitForSeconds(enemyTurnWaitTime / 2.0f);
    foreach (GridElement grid in highlightedGrids)
    {
        grid.HideHighlight();
    }
    Path path = GetEnemyPath();
    GridElement targetGrid = path.elements[path.length - 1];
    targetGrid.ShowHighlight();
    ui.HideUI();
    yield return cam.StartCoroutine("SnapToTarget", targetGrid.gameObject);
    StartCoroutine("MoveCharacterAlongPath", path);
}
In the current version, the player and enemy turns can take place one after the another. The enemy AI will try to find a way to the player character. As stated at the start, future versions of the project will include the combat system and party based gameplay.
You can access the web build of the project here.