A 3D Renderer written in C++ based on the OpenGL API. Third party libraries used for the renderer include GLFW and GLAD for the OpenGL context, GLM as the math engine, ASSIMP for loading 3D models and ImGui for rendering UI.
The Renderer uses model data to render 2D/3D Models to the screen. The models utlise shaders written in GLSL for rendering. The Blinn-phong shading model is used for lighting the scenes. A complete scene is rendered to a framebuffer and various post-processing filters can be applied to the output texture.
Features developed for the Renderer include things such as:-
Intializing GLFW, window-creation, window-settings, input-handling and other configuration settings for the renderer is done in the Renderer class.
The Renderer window is created in the Renderer class. Settings for the window and callback functions for the window are setup at the start.
// Renderer.cpp
void Renderer::SetData()
{
    glfwMakeContextCurrent(window);
    glfwSetFramebufferSizeCallback(window, framebuffer_size_callback);
    glfwSetCursorPosCallback(window, mouse_callback);
    glfwSetScrollCallback(window, scroll_callback);
#if !ENABLE_FULLSCREEN_MODE
#if ASPECT_RATIO_LOCKED
    glfwSetWindowAspectRatio(window, ASPECT_RATIO.x, ASPECT_RATIO.y);
#endif
#if WINDOW_SIZE_LIMITED
    glfwSetWindowSizeLimits(window, WINDOW_SIZE_LIMITS.x, WINDOW_SIZE_LIMITS.y,
                            WINDOW_SIZE_LIMITS.z, WINDOW_SIZE_LIMITS.w);
#endif
#endif
}
Renderer flags for settings such as Z-buffering, Stencil testing, Depth testing can be enabled/disabled in the Renderer class.
// Renderer.cpp
void Renderer::SetOtherData()
{
    EnableTest(DEPTH_TEST);                            // Enable Z buffering
    glDepthFunc(GL_LESS);                              // Closer objects will be drawn in front
    EnableTest(STENCIL_TEST);                          // Enables editing Stencil
    glStencilFunc(GL_NOTEQUAL, 1, 0xFF);               // if (n!=1) ==> (n=1) =>Draw Everything
    EnableTest(BLEND_TEST);                            // Enables Blend test
    glBlendFunc(GL_SRC_ALPHA, GL_ONE_MINUS_SRC_ALPHA); // Set Blending mode as {x*a+y*(1-a)}
    stbi_set_flip_vertically_on_load(true);            // Set before loading model
    EnableTest(FACE_CULL);                             // Enable Face Culling
    glCullFace(GL_BACK);                               // To Cull Back Faces (do no draw)
    glFrontFace(GL_CCW);                               // Front faces are those with CCW motion
}
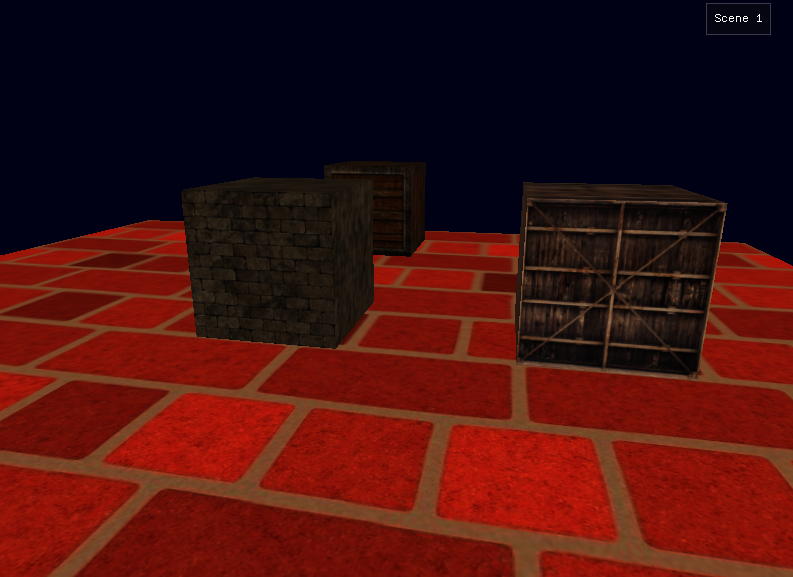
A Primitive system to render primitives models such as Cubes, Rects and Planes. FileReader functions read the primitive .2d/.3d files and convert them into vertex data.
// Quad.2d file
[Vertices]
v 0 -1.0  1.0 0.0
v 1 -1.0 -1.0 0.0
v 2  1.0 -1.0 0.0
v 3  1.0  1.0 0.0

[Colors]
c 0 1.0 0.0 0.0
c 1 0.0 1.0 0.0
c 2 0.0 0.0 1.0
c 3 1.0 1.0 1.0

[TexCoords]
t 0 0.0 1.0
t 1 0.0 0.0
t 2 1.0 0.0
t 3 1.0 1.0

[Indices]
i 0 0.0 1.0 2.0
i 1 0.0 2.0 3.0
This vertex data is stored as Vector3 (x, y, z) or Vector2 (x, y) in structs. A primitive class will hold the vertices, textures and indices.
// Primitive.h
struct Vertex2D
{
    glm::vec3 position;
    glm::vec3 Color;
    glm::vec2 TexCoord;
};

struct Vertex3D
{
    glm::vec3 position;
    glm::vec3 Normal;
    glm::vec2 TexCoord;
    glm::vec3 Color;
    glm::vec3 Tangent;
    glm::vec3 Bitangent;
};

class Primitive
{
public:
    Vertex2D* vertices2D;
    Vertex3D* vertices3D;
    unsigned int* indices;
    Texture* textures;
    VertexArray vertexArray;
    ...
};
The vertex data is categorized into channels which are feeded into the vertex shader for rendering.
// Primitive.cpp
void Primitive::SetupPrimitive()
{
    vertexArray.GenerateBuffers();
    vertexArray.BindVAO();
    if (is2D)
    {
        vertexArray.BindVBO(vertices2D.size(), sizeof(Vertex2D), &vertices2D[0]);
        vertexArray.BindEBO(indices.size(), &indices[0]);
    }
    ...

    if (is2D)
    {
        // vertex positions
        vertexArray.SetAttribArray(0, 3, sizeof(Vertex2D), (void *)0);
        // vertex color
        vertexArray.SetAttribArray(1, 3, sizeof(Vertex2D), (void *)offsetof(Vertex2D, Color));
        // vertex Texture coordinates
        vertexArray.SetAttribArray(2, 2, sizeof(Vertex2D), (void *)offsetof(Vertex2D, TexCoord));
    }
    ...
}

Image files can be converted into textures which can me uv-mapped to 3d models. The UV coordinate is present in the primitive data file or model .obj file. By specifying the path of the texture file, we can load it and return a texture-id.
// Texture.cpp
unsigned int load_texture_from_path(const char *path, bool isDiffuse, bool toClamp)
{
    ...
    stbi_set_flip_vertically_on_load(true);
    unsigned char *data = stbi_load(path, &width, &height, &nrComponents, 0);

    // Setup texture data
    if (data)
    {
        GLenum format;
        GLenum otherFormat;
        if (nrComponents == 1)
        {
            format = GL_RED;
            otherFormat = format;
        }
        else if (nrComponents == 3)
        {
            format = GL_RGB;
            otherFormat = (gammaCorrection && isDiffuse) ? GL_SRGB : format;
        }
        else if (nrComponents == 4)
        {
            format = GL_RGBA;
            otherFormat = (gammaCorrection && isDiffuse) ? GL_SRGB_ALPHA : format;
        }
        bind_texture(textureID);
        ...
    }
    else
    {
        std::cout << "Failed to load texture" << std::endl;
    }
    stbi_image_free(data);
    ...
}
The vertex and fragment shader is written in .vs and .fs files. These are read through code and converted into character arrays. The arrays are compiles into shader components which later combine to give the shader program. Rendering of objects require a shader program which defines how the final output will be shown.
// Shader.cpp
void Shader::CreateShader(const char *vertexPath, const char *fragmentPath)
{
    ...
    const char *vShaderCode = vertexCode.c_str();
    const char *fShaderCode = fragmentCode.c_str();
    unsigned int vertex, fragment;
    // vertex Shader
    vertex = CompileShader(vShaderCode, VERTEX_SHADER);
    CheckCompileErrors(vertex, "VERTEX");
    // fragment Shader
    fragment = CompileShader(fShaderCode, FRAGMENT_SHADER);
    CheckCompileErrors(fragment, "FRAGMENT");

    // shader program
    ID = glCreateProgram();
    glAttachShader(ID, vertex);
    glAttachShader(ID, fragment);
    glLinkProgram(ID);
    CheckCompileErrors(ID, "PROGRAM");
    // delete individual shaders
    glDeleteShader(vertex);
    glDeleteShader(fragment);
}
For the scene objects, each renderable object will have some material attached to it. These materials also derive from a shader template which relates to a shader file that will be compiled for rendering. A Material consists of albedo, specular and emission fields which derives from a color value and texture index.
// Material.h
struct MatField
{
    ColorF col; // The Color of the field
    int texID;  // The ID of texture
    ...
};

struct Material
{
    MatField albedo;   // The albedo/diffuse channel for the Material
    MatField specular; // The specular channel for the Material
    MatField emmision; // The emission channel for the Material
    SHADER_TYPE type;  // The type of Shader file
    ...
};
A movable Camera system with Orthographic and Perspective cameras with easily configurable properties. The camera can move in all directions and rotate along the it axes.
The camera supports 2 axis rotation using the mouse. If the cursor is moved, a function callback will be made to the rotate function which will change the pitch and yaw of the camera leading to a new orientation.
// Camera.cpp
void Camera::process_mouse(float xoffset, float yoffset, float deltaTime, GLboolean constrainPitch)
{
    xoffset *= mouseSensitivity * deltaTime * 60;
    yoffset *= mouseSensitivity * deltaTime * 60;

    yaw += xoffset;
    pitch += yoffset;

    if (constrainPitch)
    {
        pitch = clamp(pitch, -CAMERA_MAX_PITCH, CAMERA_MAX_PITCH);
    }
    update_camera_vectors();
}
Based on whether the camera is in perspective mode or orthographic mode, the projection matrix will be different for both scene rendering. The projection matrix is calculated using the glm math library.
// Scene.cpp
void SceneData::DrawActor(RenderActor *actor, int actor_id, CameraActor *cam, Vec2 screen_dimension)
{
    ...
    Mat4 projection(1.0f);
    screen_dimension.x = floor(screen_dimension.x, 0.0f);
    screen_dimension.y = floor(screen_dimension.y, 0.0f);
    if (cam->isOrtho)
    {
        float aspectRatio = (((float)screen_dimension.x) / ((float)screen_dimension.y));
        float orthoSize = cam->camSize;
        Vec2 camDimension(aspectRatio * orthoSize, orthoSize);
        projection = glm::ortho(-camDimension.x / 2.0f, camDimension.x / 2.0f, -camDimension.y / 2.0f,
        camDimension.y / 2.0f, CAMERA_NEAR_PLANE, CAMERA_FAR_PLANE);
    }
    else
    {
        projection = glm::perspective(glm::radians(cam->GetCamera()->fovZoom), ((float)screen_dimension.x) /
        ((float)screen_dimension.y), CAMERA_NEAR_PLANE, CAMERA_FAR_PLANE);
    }
    ...
}
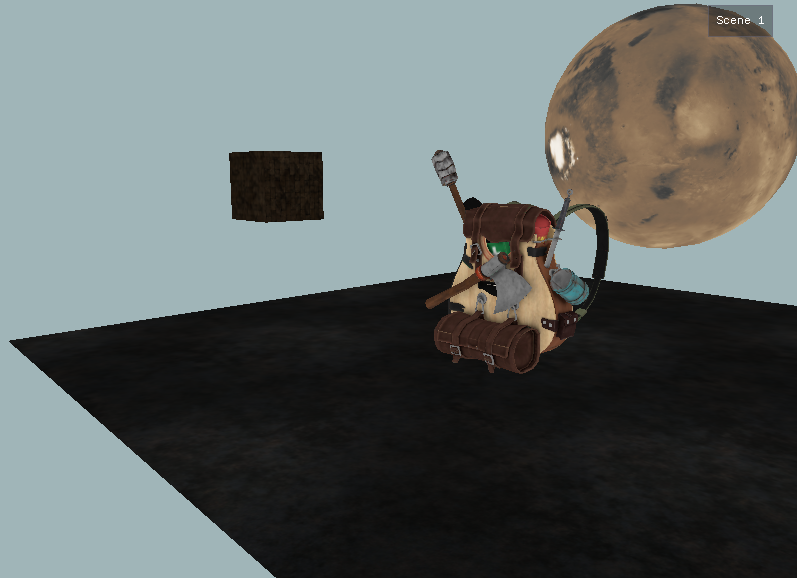
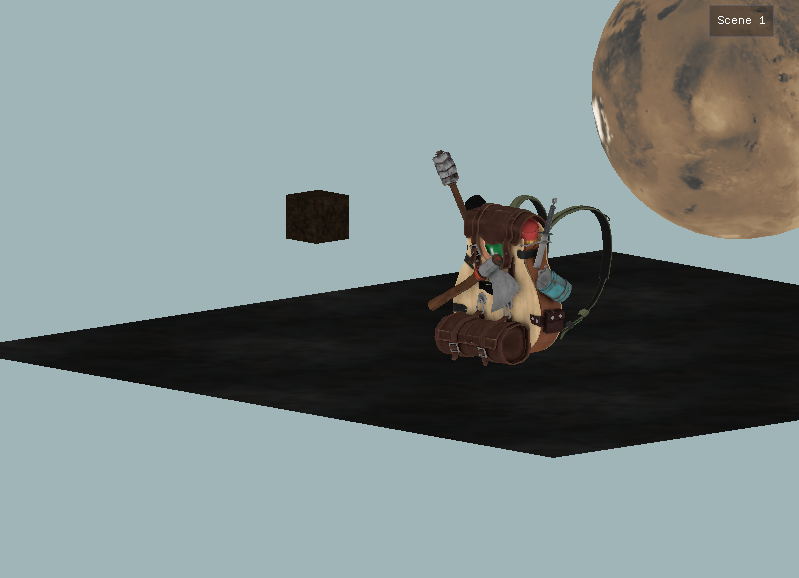
Integrated ASSIMP to help in loading pre-made 3D Assets from .obj files. Also allows importing blender models + textures when exported in the .obj format.
A model is defined as a collection of meshes. A Mesh will be a single unit which defines the vertices needed for rendering and textures which are applied to the mesh. Each vertex hold some properties required by the vertex shader for rendering.
// Mesh.h
struct Vertex
{
    glm::vec3 position;
    glm::vec3 Normal;
    glm::vec2 TexCoords;
    glm::vec3 Tangent;
    glm::vec3 Bitangent;
};

class Mesh
{
public:
    // mesh data
    Vertex* vertices;
    unsigned int* indices;
    Texture* textures;
    VertexArray vertexArray;
    ...
};
// Model.h
class Model
{
public:
    // model data
    Texture* textures_loaded;
    Mesh* meshes;
    string directory;
    bool gammaCorrection;
    ...
};

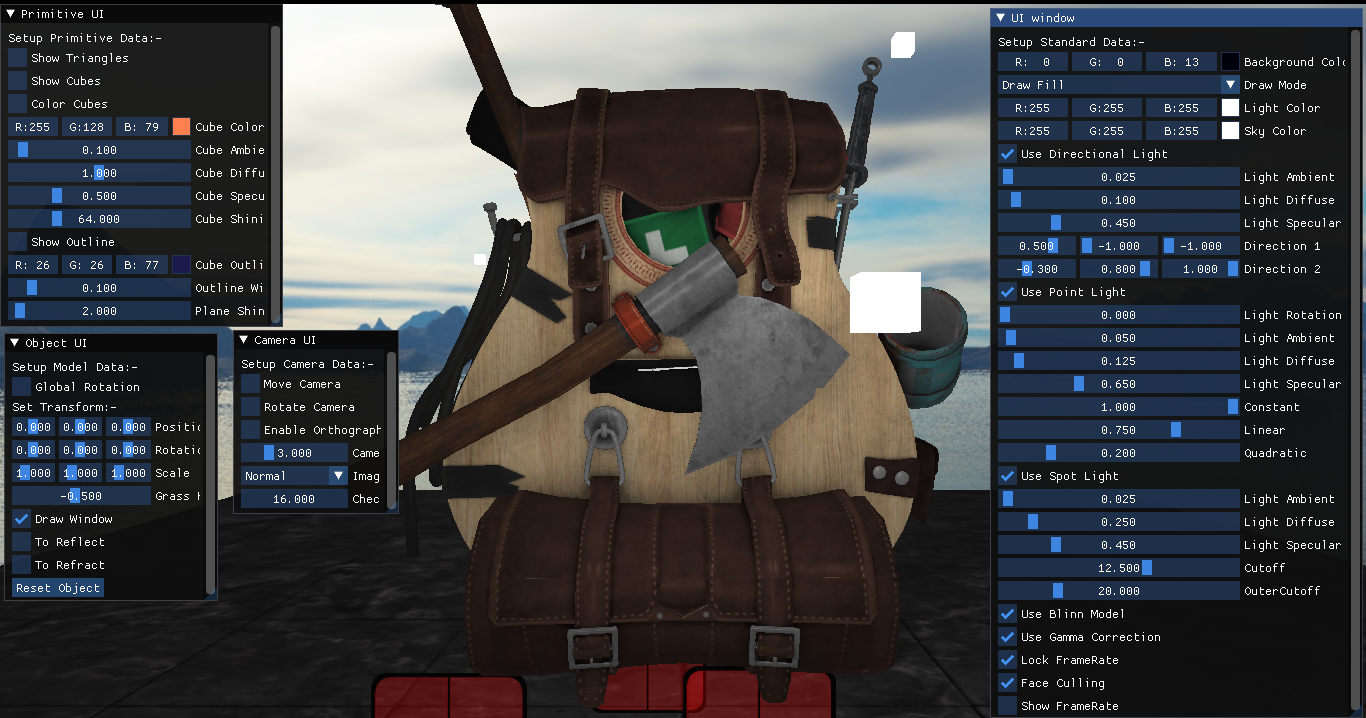
The Scene shaders for primitives and models use the Blinn-phong shading model. The lights that can be used in a scene include:-
The Shader and Light Class to set up multiple lights in a Scene. For given light sources, we can feed that data into the scene shader and calculate the approriate lighting. The lights are all dynamic with easily accessible properties. This helps in easily debugging lighting effects in shaders.
// modern/shader_scene.fs
struct DirLight {
  vec3 direction;

  vec3 ambient;
  vec3 diffuse;
  vec3 specular;
};
...
struct PointLight {
  vec3 position;

  float constant;
  float linear;
  float quadratic;

  vec3 ambient;
  vec3 diffuse;
  vec3 specular;
};
...
struct SpotLight {
  vec3 position;
  vec3 direction;

  float cutoff;
  float outerCutoff;

  vec3 ambient;
  vec3 diffuse;
  vec3 specular;
};
The Scene fragment shader has a maximum limit of light sources which can be present. We will feed the details about the light sources in our scene to the shader and it will run for any given object. The Ambient, Diffused, Specular and Emission component of the lighting will be calculated and final color will be calculated.
// modern/shader_scene.fs
void main() {
  // Scene Lighting
  vec3 norm = normalize(Normal);
  vec3 viewDir = normalize(viewPos - FragPos);
  vec3 result = vec3(0.0f);

  // 1:- Directional Light
  if (useDirLight) {
    for (int i = 0; i < min(NR_DIRECTION_LIGHTS, dirLightCount); i++) {
      result += CalculateDirLight(dirLights[i], norm, viewDir);
    }
  }

  // 2:- Point Lights
  if (usePointLight) {
    for (int i = 0; i < min(NR_POINT_LIGHTS, pointLightCount); i++) {
      result += CalculatePointLight(pointLights[i], norm, FragPos, viewDir);
    }
  }

  // 3:- SpotLight
  if (useSpotLight) {
    for (int i = 0; i < min(NR_SPOT_LIGHTS, spotLightCount); i++) {
      result += CalculateSpotLight(spotLights[i], norm, FragPos, viewDir);
    }
  }

  // Other effects
  vec3 emmision = vec3(0.0f);
  if (useTexture) {
    if (texture(material.texture_specular1, TexCoords).r == 0.0) {
      emmision = vec3(texture(material.texture_emmision1, TexCoords));
    }
  }

  // Resultant Lighting
  result += (emmision);
  if (correctGamma) {
    result = pow(result.rgb, vec3(1.0 / gamma));
  }
  FragColor = vec4(result, 1.0f);
}

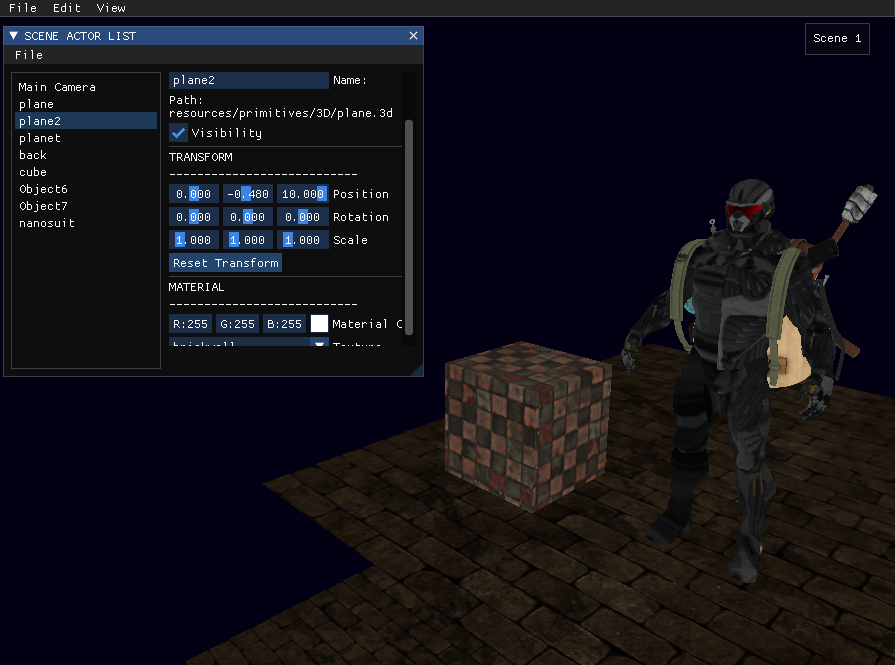
GUI with ImGui to debug the scene and alter the properties of Scene Objects and Renderer. The GUI is abstracted to instantiate multiple windows with configurable properties.
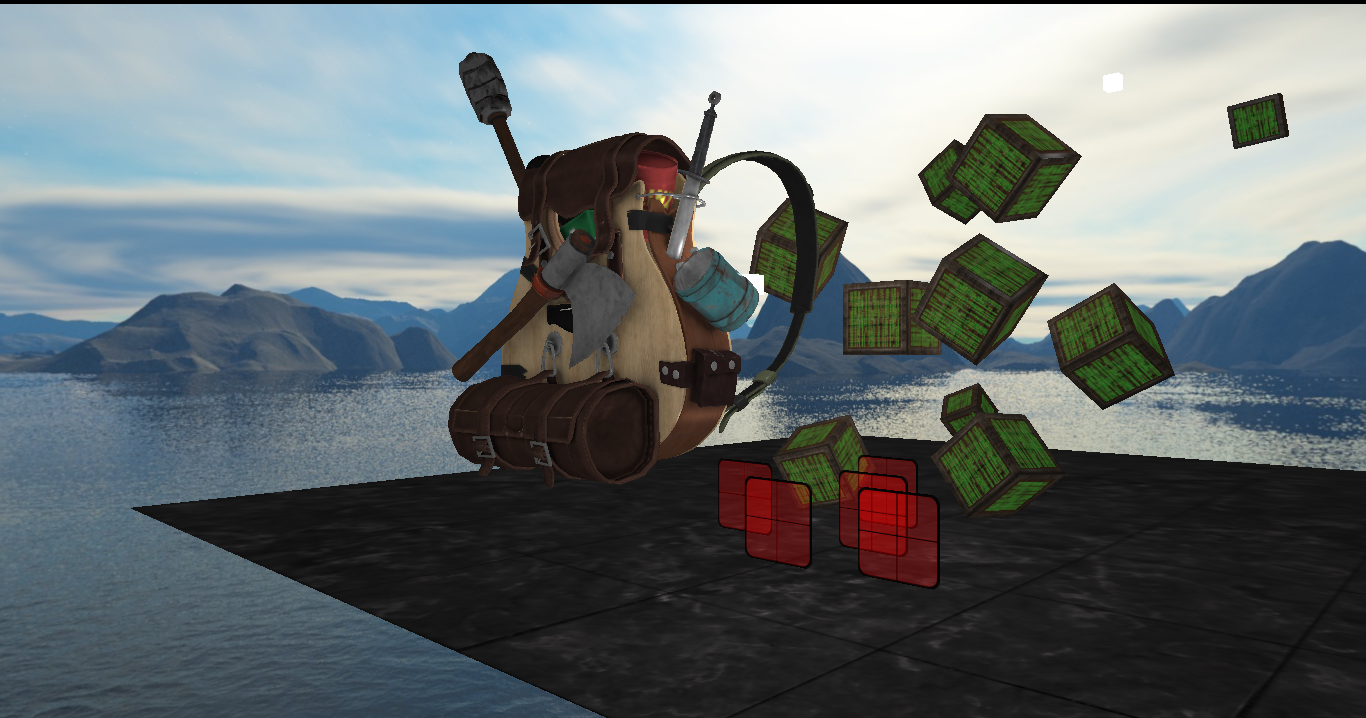
The output of the renderer in a given loop is rendered to a framebuffer. We can apply this framebuffer texture to a screen rect spanning the screen. The screen rect is rendered using a framebuffer shader through which various filters can be applied to the scene.

// modern/shader_frame.fs
void main() {
  vec3 finalColor = vec3(texture(material.texture_diffuse1, TexCoord));
  if (filterChoice == 1) // Invert Colors
  {
    finalColor = vec3(1.0f) - vec3(texture(material.texture_diffuse1, TexCoord));
  }
  else if (filterChoice == 2) // Weighted Grayscale
  {
    float average = 0.2126 * finalColor.r + 0.7152 * finalColor.g + 0.0722 * finalColor.b;
    finalColor = vec3(average);
  }
  ...
  FragColor = vec4(finalColor, 1.0);
}
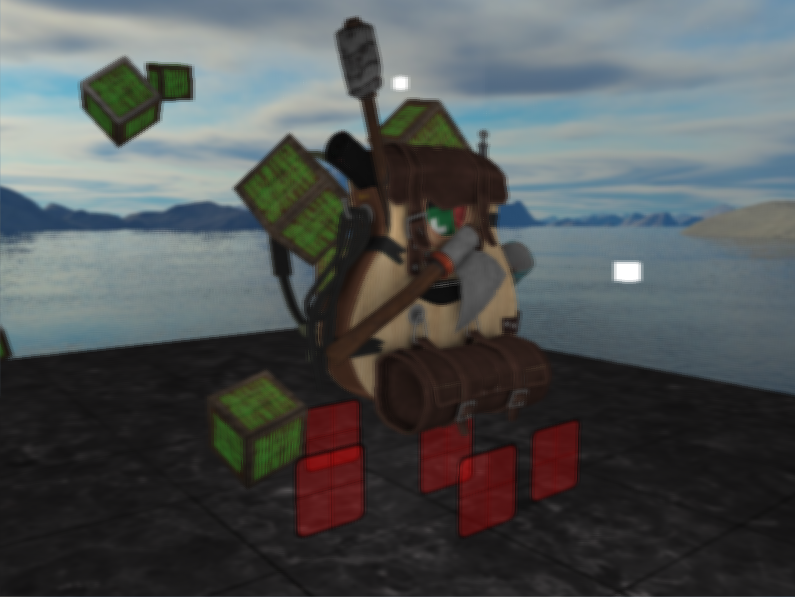

Render Loops used for the rendering of game objects will be done in the Application and Scene classes. For rendering transparent objects, skyboxes and other objects, a sequence is needed.
// Render Loop
1. New Frame
2. Process Scene
    a. Get New Data
    b. Process Data
    c. Refresh Last Frame
        i. Clear Screen
        ii. Bind FBO
    d. Render Objects
        i. Draw Opaque Objects
            i. Ground First
            ii. Others Second
        ii. Draw Translucent Objects
            i. Farthest to Closest
        iii. Draw Skybox
        iv. Draw 2D objects
    e. Render FBO
        i. Unbind FBO
        ii. Clear Screen
        iii. Draw Texture
3. Render GUI
4. End Frame
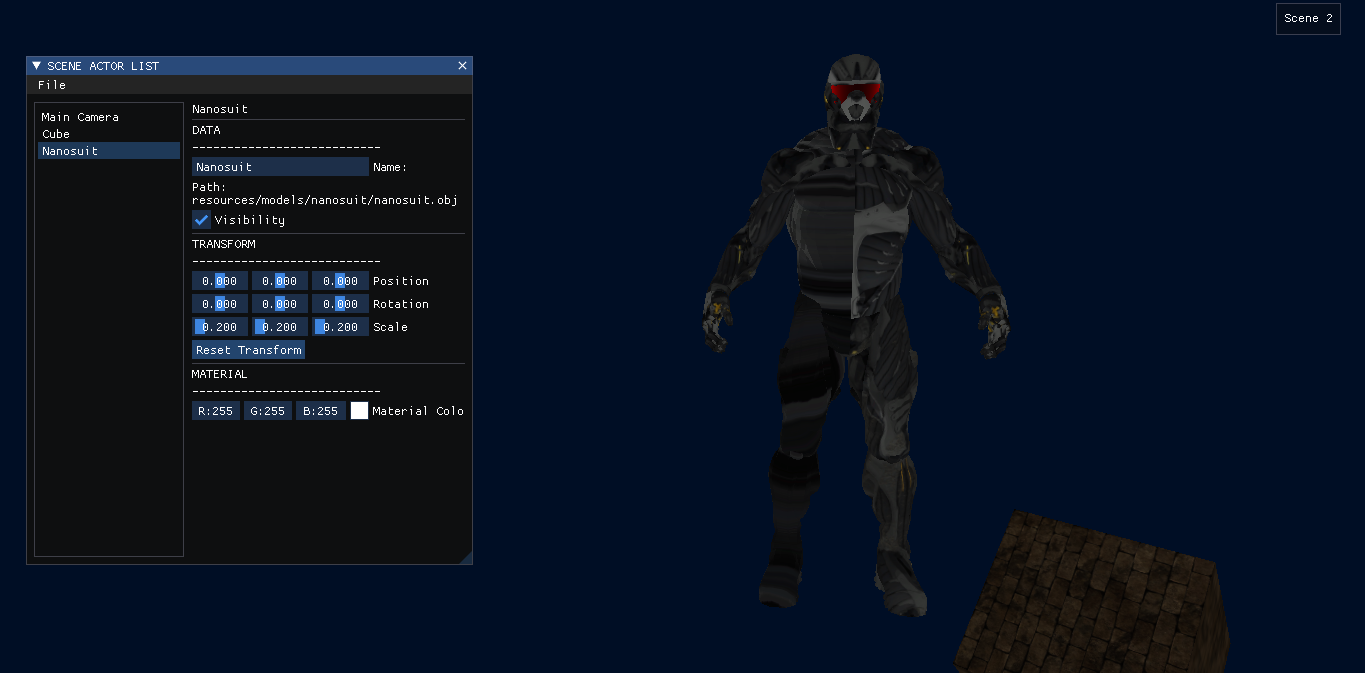
The latest build of the renderer comes with the new Scene-Actor system. The architecture includes:-
This is the default state in which no scene is running and no assets are loaded.
The user can create a new scene. At any given time, maximum of 3 scenes can be loaded in the renderer and the user can shift between scenes easily. The user can edit properties such as draw mode and background color. The Object List gui will be shown which includes the default camera.
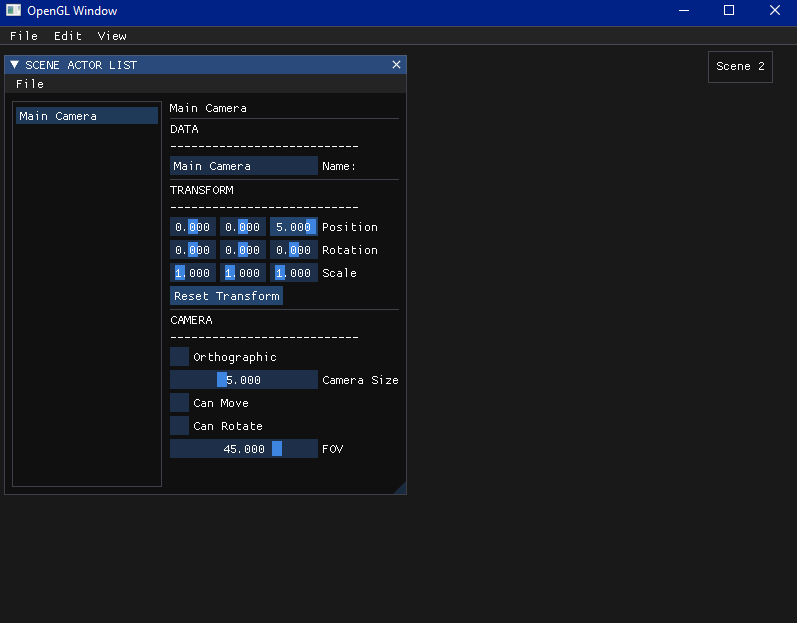
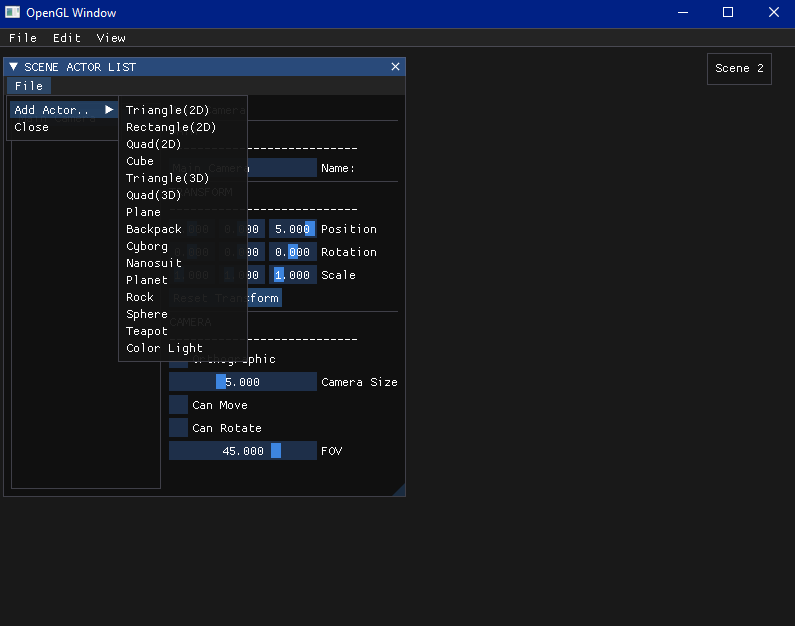
The user can add new Actors to a scene in the form of 2D objects, 3D objects, Camera and Lights. Any new actor will be added to the object list and shown in the Object List gui.

Predefined properties of the loaded actors such as color, position, name can be altered using the gui. These would help the user in creating their own scenes and easily debug effects on template scenes.

Textures can also be added to a primitive shape. This will change the shader type/material of the actor and the change will reflect in the window.

Third party models can also be added like primitives using the UI. The models are loaded at runtime. Adding a pre-loaded model does not require runtime.